What have I been doing for 2 weeks? Searching for an easy pillowcase pattern to make to cover the pillows on my bed. ( For some reason, I have seemed to loose pillowcases like others loose socks, and now I find myself with 4 pillows in desperate need of some cases.) So, I have been busy searching my local stores trying to find some that will match my curtains and bedspread, but no luck.
{Back Story}
When we moved into the house I painted my room a light blue and wanted a brown quilt/throw to go over the bed, blue sheets, and I was going to make the curtians out of the City Girl Blue/Brown fabric. Guess how much fabric I bought, somewhere in the neighborhood of 20 yards. ***GASP*** Okay, I know what you are thinking, I have no idea why I thought I needed that much fabric, it is not like the entire wall is covered in windows. So, needless to say, because I ended up finding this awsome bedspread at Overstock.com and then matching curtains, I still have ALL that fabric left. Lucky for me, it is in 4 different coordinating patterns.
{Back to the original thought process}
So, anyway, I have all this fabric, no pillowcases, and since I am also currently working on 3 different bedding sets, not alot of time, I needed something easy.
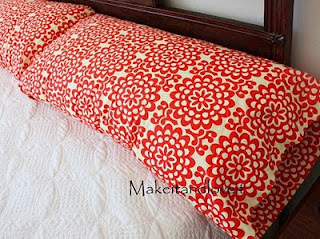
*on a side note, I think Blogger took away Spell Check so if you see any spelling errors, don't blame me, blame Blogger.
{Back to the original thought process}
So, anyway, I have all this fabric, no pillowcases, and since I am also currently working on 3 different bedding sets, not alot of time, I needed something easy.
I FOUND IT!!!
Here, at Make It and Love It, Ashley shows us how to make pillowcases. It is sooooooo easy. (Why I didn't just think to do this is beyond me but I am going to blame it on all the snow days we have had out of school). And since tomorrow is a snow day also, I am making me some of these.
~Amanda~


 I personally love this


 (Oh yah, no commenting on the extremely neat sewing table in the background)
 And a strap made out of your remaining fabric. (I forgot to take a picture of the fabric cut out before I started sewing so just pretend this has all 4 squares and the strap).


 Next you will take your inner lining and turn it right side out. (My lining is my star fabric). Leave the outer bag inside out for right now.
 I find it easier at this step to pin your straps in place. To do this, open up your outer shell (remember it is still turned inside out -fabric on the inside of the bag- at this point.) Then just drop your strap in, making sure it is not twisted, lay it out along the sides of the bag. I just kinda eyeball the middle of the bag on either side and pin in place.
  Now you will lay your lining inside your shell. It should layer like this: Inner lining (fabric on outside of bag), Strap, Outer lining (fabric on inside of bag). You fabrics will be facing each other with the strap in the middle.


 You take your lining and just push it into your shell.
 you will need to topstich around the entire top of the bag.





 Posts
Posts

